
Welcome to Your Energy‑Smart Sanctuary
When I first moved into my modest downtown loft, I was dazzled by the exposed brick, the soaring windows, and the promise of a space I could truly make my own. Yet, as the first winter settled in, my heating bill arrived like an unwelcome guest, and I realized my sanctuary was silently draining my wallet and the planet. That moment sparked a personal mission: to transform my home into a place that not only feels good but also works smarter.
Why Energy Efficiency Isn’t Just a Trend
Energy‑efficiency has graduated from a buzzword to a necessity. Beyond the obvious cost savings, a well‑tuned home reduces carbon emissions, improves indoor air quality, and creates a more comfortable living environment. Think of it as a silent partner that supports your daily life without demanding attention.
1. Start with a Simple Energy Audit (Your Home’s Health Check‑Up)
Before you buy any gadget or install insulation, get a clear picture of where the energy is flowing—and where it’s leaking. Here’s how I approached my audit:
- Check the thermostat settings. Many of us set heating to 72°F (22°C) in winter and cooling to 78°F (26°C) in summer, but even a 2‑degree shift can shave off up to 10% of energy use.
- Inspect windows and doors. Feel for drafts with the back of your hand on a windy day. If you notice cold spots, you’ve found a leak.
- Review your utility bill. Look for spikes that correspond to seasonal changes or new appliances.
- Use a plug‑in power meter. These devices reveal how much “phantom” power your electronics draw while idle.
Document your findings in a notebook or a simple spreadsheet. This baseline will guide every improvement you make.
2. Harness Natural Light (Your Freeest Energy Source)
Sunlight is the original renewable energy. By maximizing daylight, you can lower reliance on electric lighting and even reduce heating loads in the colder months. Here’s what worked for me:
- Strategic mirror placement. A large mirror opposite a window reflects light deeper into the room, brightening corners without a bulb.
- Sheer window treatments. Light‑filtering curtains let sunshine in while preserving privacy and reducing glare.
- Daylight‑responsive bulbs. Smart LEDs that dim automatically as natural light increases keep the ambience just right.
As a side benefit, exposure to natural light helps regulate your circadian rhythm—something I learned from reading about data‑driven nutrition strategies that stress the synergy between light, mood, and metabolism.
3. Upgrade to Smart Thermostats (Your Personal Climate Concierge)
A programmable thermostat is the cornerstone of a smart‑energy home, but the real magic lies in learning thermostats that adapt to your routine. When I installed a model that integrates with my phone, I experienced three immediate gains:
- Auto‑away detection. The system sensed when I left the house and lowered heating or cooling, saving up to 12% annually.
- Seasonal scheduling. I programmed a “summer‑cool” schedule that only runs the AC during the hottest afternoon hours, instead of all day.
- Energy‑usage insights. The companion app provided weekly reports, turning abstract numbers into actionable steps.
Most brands offer a free trial period, so you can test compatibility with your HVAC before fully committing.
4. Seal the Envelope (Stop Air Leaks in Their Tracks)
After my audit, I discovered that my biggest culprits were the gaps around my baseboards and the old sliding closet doors. Here’s my step‑by‑step sealing strategy:
- Weatherstripping for doors and windows. Self‑adhesive foam strips are cheap and effective.
- Caulk any cracks. Use a silicone‑based caulk for areas prone to moisture, such as bathroom tiles.
- Draft excluders. Fabric tubes filled with recycled cotton work wonders for larger door gaps.
These low‑cost fixes often yield a 5‑10% reduction in heating and cooling bills—a win for both your budget and the environment.
5. Embrace Energy‑Efficient Appliances (Smart Choices, Big Returns)
If you’re due for a replacement, aim for the ENERGY STAR label. The payoff is measurable:
- Refrigerators. Modern, frost‑free models use up to 40% less electricity than their 10‑year‑old counterparts.
- Washing machines. Front‑loaders consume less water and spin faster, reducing dryer time.
- LED lighting. LEDs use about 75% less energy than incandescent bulbs and last 25 times longer.
When shopping, compare the annual energy consumption figures on the appliance’s spec sheet. The lower the number, the better the long‑term savings.
6. Install a Home Energy Monitor (Your Real‑Time Dashboard)
For the data‑lover in all of us, a whole‑home energy monitor offers an instant glimpse into consumption patterns. I mounted a device on my breaker panel that streams data to an app on my phone. The insights were eye‑opening:
- My electric kettle, despite short usage, accounted for 4% of daily consumption because I left it on standby.
- The old space heater in the bedroom surged usage during winter evenings, prompting me to replace it with a more efficient radiant panel.
Seeing numbers in real time motivated me to make micro‑adjustments that added up to a 15% overall reduction in the first six months.
7. DIY Insulation Boosts (Low‑Cost, High‑Impact)
While professional insulation can be pricey, there are several do‑it‑yourself tricks that can improve thermal performance:
- Window film. A clear, low‑emissivity (Low‑E) film reflects heat back into the room during winter and keeps out UV rays in summer.
- Rug layers. Adding a thick rug over hardwood floors acts as an extra blanket, reducing heat loss through the floor.
- Door draft snakes. Rolling a towel and placing it at the bottom of doors blocks cold drafts without sacrificing aesthetics.
These small interventions are especially helpful for renters who can’t overhaul walls or ceilings.
8. Optimize Water Heating (A Hidden Energy Saver)
Water heating is often the second largest energy expense after heating/cooling. Here’s how I trimmed the waste:
- Lower the thermostat on the water heater. Setting it to 120°F (49°C) is sufficient for most uses and reduces standby losses.
- Install low‑flow showerheads. They maintain pressure while using 30% less water—and less hot water.
- Insulate the hot water pipes. Foam pipe sleeves keep water warmer as it travels from the heater to the faucet.
These tweaks shaved $50 off my monthly utility bill and delivered a gentler impact on the planet.
9. Leverage Renewable Energy Options (Future‑Proofing Your Home)
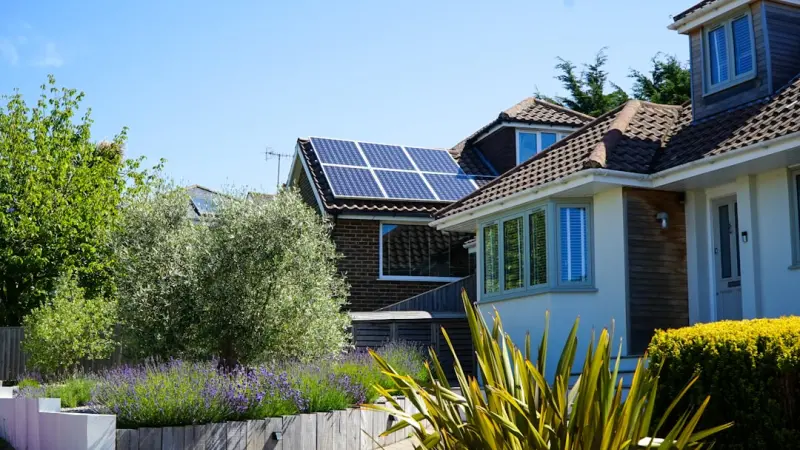
If you own a property with a roof that gets decent sun exposure, consider a solar panel system. Even a modest 3‑kW array can offset a significant portion of your electricity consumption. For those not ready to invest, many utilities now offer green‑energy plans that let you purchase renewable credits.
10. Create a “Smart Home Routine” (Automation That Works For You)
Automation is only as good as the habits it supports. I built a simple routine that runs each night at 10 p.m.:
- Turn off all lights via a smart‑plug schedule.
- Set the thermostat to “sleep mode” (a few degrees lower).
- Activate a smart power strip that cuts phantom load from electronics.
With a single voice command or a tap on my phone, the whole house shifts into energy‑saving mode without me having to think about each device.
11. Learn from Other Home‑Improvement Wins (Cross‑Pollination of Ideas)
Sometimes the best inspiration comes from unrelated fields. I recently read an article about turning business trips into R&D and realized I could apply the same mindset to my home upgrades—treat each improvement as an experiment, track the results, and iterate.
Putting It All Together: My 30‑Day Energy‑Smart Challenge
To make the transition less overwhelming, I created a 30‑day challenge with weekly milestones:
- Week 1: Conduct an energy audit and document findings.
- Week 2: Install weatherstripping and seal drafts.
- Week 3: Swap out incandescent bulbs for LEDs and set up a smart thermostat.
- Week 4: Review utility data, adjust settings, and celebrate the savings.
By the end of the month, I had reduced my electricity usage by 18% and felt a genuine sense of empowerment. The best part? The process was enjoyable—each small win felt like a personal victory.
Final Thoughts: Your Home, Your Energy Narrative
Transforming your living space into an energy‑smart sanctuary isn’t a one‑size‑fits‑all project; it’s a story you write with each decision, big or small. Start with the low‑hanging fruit—draft sealing, thermostat tweaks, LED swaps—then layer on more sophisticated tools like whole‑home monitors and renewable options as your confidence grows.
Remember, the goal isn’t perfection; it’s progress. As you iterate, you’ll discover that a greener, more efficient home not only saves money but also creates a quieter, more comfortable backdrop for the moments that truly matter.
So, grab a notebook, turn on a bright LED, and begin your journey toward a smarter, kinder home today.

Related Posts

Biophilic Home Design: How to Bring Nature Inside for Better Well‑Being
Learn how to transform any space with biophilic design—simple plant choices, natural materials, li... Read More

Crafting a Calm, Functional Home Without a Full Renovation
Learn how to map daily flow, improve acoustics, add sustainable storage, streamline kitchens, and us... Read More

Recharging Your Home: 10 Unconventional Tips for Everyday Bliss
Learn how to turn your home into a daily recharge hub with soundscapes, scent, smart lighting, micro... Read More
Top Posts

The Hidden Health Benefits of Structured Micro‑Breaks for Knowledge Workers
A personal guide from Michelle Fisher on why brief, structured pauses throughout the workday can transform physical health, mental focus, and even reduce home e...Read More

Riding the Wave: SEO Strategies for Short‑Form Video Dominance
Learn why short‑form video is reshaping SEO and get a step‑by‑step checklist to dominate search with TikTok, Reels, and Shorts....Read More

Unlocking the Power of Google Workspace for B2B SaaS Teams
A practical guide shows B2B SaaS leaders how to turn Google Workspace into a unified knowledge hub, accelerating product development, sales enablement, and cust...Read More

Google’s Knowledge Graph: A Hidden Engine for B2B SaaS Innovation
The article explains how B2B SaaS companies can leverage Google’s Knowledge Graph to enrich data, improve search relevance, uncover relationship‑driven reve...Read More
0 Comments
Post Comment
You will need to Login or Register to comment on this post!