
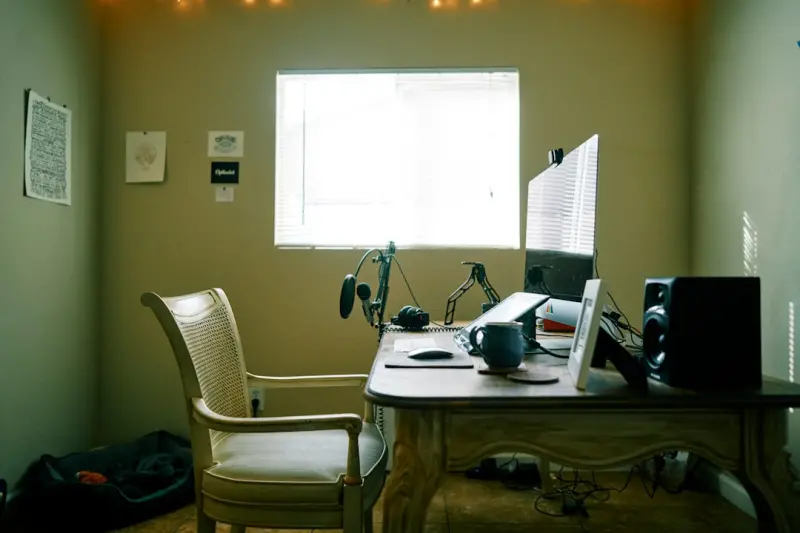
Working from home has become the norm for many professionals, but the noisy world outside (and sometimes inside) our walls can quickly turn a productive day into a frustrating one. While most advice circles around ergonomic chairs or better lighting, I’ve spent the last year experimenting with acoustic solutions that actually silence the chaos without draining your wallet. In this post, I’ll walk you through a step‑by‑step, budget‑friendly roadmap to soundproof your home office, from the science of sound absorption to clever décor tricks that double as style statements. Whether you’re on a tight budget, a DIY enthusiast, or simply craving a calmer space to think, these tips will help you create a quiet sanctuary that boosts focus, protects your privacy on Zoom calls, and even improves your overall well‑being.
Why Sound Matters More Than You Think
It’s easy to underestimate the impact of ambient noise on productivity. Studies show that background chatter, traffic, and even the hum of appliances can increase cortisol levels, reduce concentration, and impair short‑term memory. In a home office, these distractions aren’t just annoying—they’re measurable performance killers. A quiet environment not only sharpens your thinking but also gives you a professional edge during virtual meetings, where stray noises can betray a lack of preparation.
Beyond the obvious, sound quality influences how you feel in a space. Soft, muffled sounds can make a room feel cozy and safe, while sharp, echoing noises can create a sense of unease. By controlling acoustics, you’re essentially curating the mood of your workspace, turning it into a place where ideas can flow uninterrupted.
Understanding the Basics of Acoustics
Before diving into DIY projects, it helps to grasp three core concepts:
- Reflection: Sound waves bounce off hard surfaces like glass, concrete, and bare walls, creating echo.
- Absorption: Soft, porous materials (fabric, foam, wood) soak up sound, reducing echo and reverberation.
- Isolation: Blocking sound from traveling through walls, floors, or ceilings, typically using dense or specially designed barriers.
For a home office, the sweet spot is a balanced mix of absorption and isolation. You’ll want to dampen echoes inside the room while preventing external noise from seeping in. The good news? You can achieve both with everyday items and a few strategic upgrades.
Step 1: Seal the Gaps—Your First Line of Defense
Airborne noise loves to slip through cracks—around windows, doors, baseboards, and even electrical outlets. A quick inspection can reveal hidden pathways for sound. Here’s how to seal them effectively:
- Weatherstripping: Apply adhesive-backed strips around door frames. It creates a soft seal that blocks both drafts and sound.
- Door sweeps: Install a sweep at the bottom of the door to plug the gap between the floor and door.
- Acoustic caulk: Use this special, flexible sealant around window frames and baseboards. Unlike regular caulk, it remains pliable, maintaining its sound‑blocking properties over time.
- Outlet seals: Foam gaskets that fit behind outlet covers can cut down on noise that travels through electrical boxes.
These tiny tweaks can reduce outside noise transmission by up to 30%, making the rest of your soundproofing efforts much more effective.
Step 2: Add Mass—The Power of Dense Materials
When it comes to isolation, mass is your ally. Heavier walls, doors, and windows stop sound waves in their tracks. You don’t need to rebuild your home, but you can strategically add density where it counts.
- Mass‑loaded vinyl (MLV): A thin, flexible sheet you can attach to walls or ceilings. It adds substantial mass without taking up much space.
- Heavy curtains: Thick, floor‑length drapes not only block light but also dampen noise from outside. Look for curtains with a dense backing or add a second layer for extra heft.
- Bookshelves filled with books: A classic trick—stacking books creates a wall of mass that both absorbs and reflects sound. Pair this with decorative items for a polished look.
Even a single layer of MLV on a wall facing a noisy street can cut perceived noise levels dramatically. Combine this with the sealing steps above, and you’ll notice an immediate hush.
Step 3: Embrace Absorption—Soft Surfaces That Work
Now that you’ve limited noise entry, it’s time to tame what’s already inside the room. Soft, porous surfaces capture sound waves and convert them into tiny amounts of heat—a process that quiets the space without any electronics.
Here are budget‑friendly ways to boost absorption:
- Acoustic panels: DIY panels can be made from wooden frames filled with rockwool or recycled denim insulation, then covered with breathable fabric. Hang them on the wall at the first reflection points (the spots where sound bounces straight back to your ears).
- Rugs and floor mats: A thick rug under your desk can significantly reduce floor‑borne vibrations, especially if you have hardwood or tile flooring.
- Cushioned furniture: Upholstered chairs, sofas, and even a plush ottoman act as natural sound absorbers.
- Fabric wall hangings: Tapestries, quilts, or even a wall‑mounted blanket can double as art and acoustic treatment.
For a visual guide on how to make your own panels, check out light‑enhancing décor ideas. While the original article focuses on illumination, the same principles of layering fabric over a frame apply to acoustic panels, giving you a cohesive aesthetic.
Step 4: Strategic Placement of Soft Items
Acoustic science tells us that the “first reflection points”—the spots where sound first hits a wall and bounces back—are the most important to treat. A simple method to locate them:
- Have a friend sit in your chair and play music or talk on the phone.
- Walk around the perimeter of the room; wherever you hear the sound first, that wall is a reflection point.
- Place a panel or soft item on that spot.
Repeat for the ceiling and any adjacent walls. You’ll be surprised how a few well‑placed panels can eliminate echo and make your voice sound richer on conference calls.
Step 5: Quiet the Floor—Dealing with Impact Noise
Footsteps, rolling chairs, and the occasional dropped pen can transmit vibrations through floors, especially in apartments with thin flooring. Here’s how to tame those low‑frequency thuds:
- Floor underlayment: Peel‑and‑stick foam underlayments can be installed beneath rugs to absorb impact.
- Chair mats: A dense rubber mat under your chair reduces the noise of rolling wheels.
- Furniture pads: Felt pads under the legs of desks or shelves prevent them from rattling against the floor.
These inexpensive solutions keep your office quiet without compromising mobility or ergonomics.
Step 6: Tame the Ceiling—The Overlooked Noise Source
If you live in a multi‑story building, upstairs footsteps can be a nightmare. While full‑scale ceiling insulation is a major project, there are simpler tricks:
- Acoustic tiles: Click‑in acoustic ceiling tiles can be installed directly over existing drywall, adding both visual texture and sound absorption.
- Soft ceiling hangings: Fabric drapes or decorative acoustic clouds can be suspended from the ceiling to break up sound paths.
These options are especially handy for renters, as they often don’t require permanent alterations.
Step 7: Add a Touch of Green—Plants That Quiet the Room
Beyond aesthetics, certain houseplants help improve acoustics by breaking up sound waves. Broad‑leaf varieties like the Fiddle Leaf Fig, Rubber Plant, and Boston Fern act as natural diffusers. Arrange a few strategically on shelves or floor corners to add both visual calm and a modest acoustic benefit.
Combine this green touch with the earlier suggestion of using fabric wall hangings to create a multi‑layered, eco‑friendly soundscape.
Step 8: Fine‑Tune Your Tech Setup
Even the best acoustic treatment can’t fix a poor microphone or speaker placement. Pair your soundproofed space with these tech tips:
- Directional microphones: These capture your voice while rejecting background noise.
- Headphone monitoring: Use closed‑back headphones to hear exactly what’s being transmitted.
- Noise‑cancelling software: Tools like Krisp or built‑in platform filters can further clean up audio in real‑time.
When you combine a quiet room with clean capture tools, your virtual presence feels professional and confident.
Step 9: Keep It Stylish—Design Meets Function
Soundproofing doesn’t have to look like a construction site. Here’s how to keep your office chic:
- Color‑coded panels: Choose fabrics that match your brand colors or personal palette.
- Modular shelving: Use open‑back bookshelves to house both books (mass) and decorative items (style).
- Artful curtains: Opt for patterned, heavy curtains that double as sound blockers and visual focal points.
For inspiration on merging function with flair, explore smart entry solutions. The same principles of stylish, purposeful design apply throughout your office.
Maintenance and Long‑Term Tips
Acoustic treatments, like any home improvement, benefit from periodic check‑ups:
- Inspect weatherstripping and caulk annually; replace any that’s cracked or losing adhesion.
- Rotate or clean fabric panels to prevent dust buildup, which can reduce absorption efficiency.
- Re‑evaluate the placement of panels when you rearrange furniture or add new tech.
Regular maintenance ensures your sound sanctuary stays effective and looks fresh.
Putting It All Together—A Sample Room Blueprint
Imagine a modest 10×12‑foot home office with a window facing a busy street. Here’s how you could apply the steps above:
- Seal: Apply acoustic caulk around the window frame, install a door sweep, and add weatherstripping to the door.
- Mass: Hang a heavy‑fabric curtain over the window, attach a thin layer of MLV to the wall opposite the window, and place a fully stocked bookshelf against the same wall.
- Absorption: Create two DIY acoustic panels using rockwool and cover them in navy fabric; mount them on the first reflection points on the side walls.
- Floor: Lay a thick, woven rug under the desk and a rubber chair mat beneath the rolling chair.
- Ceiling: Install a few acoustic tiles in a decorative pattern across the ceiling.
- Plants: Position a tall Rubber Plant in the corner and a Boston Fern on the bookshelf.
- Tech: Use a directional USB microphone with a pop filter and closed‑back headphones for calls.
The result? A room that feels cocooned, looks polished, and delivers crystal‑clear audio for meetings—all for under a modest budget.
Final Thoughts
Soundproofing isn’t a one‑size‑fits‑all project; it’s a series of small, intentional choices that compound into a dramatically quieter environment. By sealing gaps, adding mass, embracing soft surfaces, and sprinkling in a few green companions, you can transform any noisy corner into a focused, professional haven. The best part? Most of these upgrades are reversible, making them perfect for renters or anyone who likes to keep their space adaptable.
Take the first step today—identify the loudest source of noise in your office and tackle it with one of the tricks above. In a few weeks, you’ll notice a tangible boost in concentration, fewer awkward “can you hear me?” moments, and an overall sense of calm that spills over into your work and life.
Happy quiet‑building!

Sanji Patel has dedicated 25 years to the SEO industry. As an expert SEO consultant for news publishers, he emphasizes providing both technical and editorial SEO services to news publishers worldwide. He frequently speaks at conferences and events globally and offers annual guest lectures at local universities.
Related Posts

The Secret to a Clutter-Free Home: Low‑Tech Hacks That Actually Stick
A hands‑on guide to low‑tech home organization, featuring simple audits, vertical storage, and d... Read More

The Low‑Maintenance Indoor Garden: Green Living for Busy Homes
A practical guide to creating a thriving indoor garden with minimal effort, perfect for busy profess... Read More
Turn Your Home Into a Sound Sanctuary: Simple Acoustic Hacks for Every Room
Learn how to transform any room into a sound sanctuary using simple, affordable acoustic upgrades—... Read More
Top Posts

Composable SaaS: How Modular Architecture Is Redefining Business Agility
A deep dive into composable SaaS, exploring its design principles, real‑world benefits, and a step‑by‑step playbook for transitioning from monolithic plat...Read More

The Silent Surge: Audio‑First Marketing for SaaS Growth
A deep dive into why SaaS companies should embrace audio‑first marketing, from podcasts to voice‑activated ads, with practical steps to integrate sound into...Read More

Ambient Computing: The Quiet Revolution Redefining Enterprise Workflows
Ambient computing blends sensors, AI, and context‑aware services to make technology a seamless background partner. This post outlines its core components, rea...Read More

Beyond the Buzz: How Biofeedback Wearables Are Redefining Workplace Wellness
Biofeedback wearables provide real‑time health insights, turning personal data into actionable workplace wellness. Learn how to implement them responsibly, im...Read More
0 Comments
Post Comment
You will need to Login or Register to comment on this post!